上一篇介紹有關如何透過Hexo與Github架設Blog網站,
這一篇來介紹NexT主題設定、實際使用Hexo及Hexo其他常用套件
Theme:NexT
主題的部分,Hexo官網上有許多主題可供大家下載,
建議可以找近期還有在維護的主題,
本篇以許多人選擇的NexT主題為例。
(因為我喜歡乾淨整潔的畫面私心推薦XD)
NexT基本安裝
雖然說叫安裝,但其實也只是把它從Github上面拉下來,
首先,先切換到themes/資料夾中,並建立一個NexT資料夾,
完成後,再開啟Terminal到Repository的資料夾中,
並從NexT Github中將所有檔案$git clone下來。
1 | $cd <repo_file> # 通常為 <user_name>.github.io |
clone完成後,必須修改根目錄的_config.yml檔案,
將# Extensions中的theme:部分加入資料夾名稱NexT。
1 | # Extensions |
修改完根目錄的_config.yml並Deploy就完成NexT基本安裝了。
NexT _config.yml 設定
由於NexT可以加入的功能太多種,以下將挑幾個較容易使用到的來做說明:
NexT設置Blog的logo
如果希望更改Blog網站的logo,
只要將圖片放入NexT/source/images/資料夾中,
並調整以下code(使用不同裝置開啟所顯示的圖片),
即可變更Blog的logo。
(建議將要更換的logo圖片大小,調整成與預設NexT圖片大小一致)
1 | favicon: |
NexT版型設定
NexT目前有四種版型,
想更換版型的話可在Schemes這邊進行調整(都是黑白為主),
剛安裝完成預設主題將會是Muse,拿掉註解即可更換,
可以利用$hexo server自己trytry看想要使用哪一種。
1 | # Schemes |
NexT menu
這部分主要是在調整網站其他頁面的icon,
如:首頁(home)、關於我(about)、標籤(tags)、分類(categories)等,
(這裡調整後,要記得到根目錄的_config.yml檔案,將# Header的部分對應的頁面註解拿掉,才會顯示出頁面)||後面是指想要使用的icon,
icon將使用Font Awesome(fa)網站中的icon,
基本上大部分只需要輸入fa fa-<icon_name>即可。
1 | menu: |
網站訪問人數、文章閱讀人數
如果想在網站底下新增累積Blog訪問人數、累積文章閱讀人數,
只要將enable: false改為enable: true即可開啟該功能,
同時,也可以透過Font Awesome來改變icon。
1 | busuanzi_count: |
Google Analytics(GA)
首先要先擁有一個Google帳號,並前往Google Analytics開啟服務,
開啟GA服務後,要先建立一個GA的帳戶,
建立完成後,到設定 > 帳戶 > 資料流串 > 網頁串流詳情(GA_id),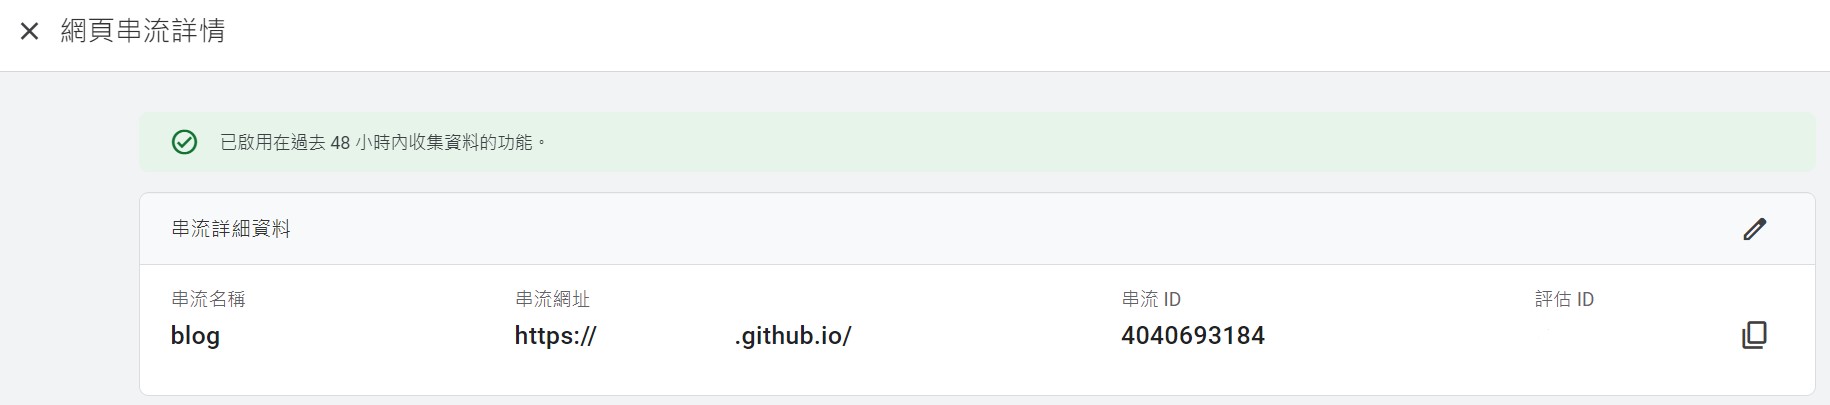
找到GA_id後,將這串GA_id複製貼到以下tracking_id這邊做設定即可。
1 | # Google Analytics |
社群網站連結設定
將社群網站連結加入Blog中,
(可以透過Font Awesome來改變icon)
只要將連結的註解取消即可。
1 | social: |
側邊大頭貼設定
若要開啟此功能,只要將下方url部分的註解拿掉即可,
目前預設圖像是avatar.gif(一個灰色人像),
想要跟換的話,只要將大頭貼放到next/source/images/<your_photo>並更改url就可以更換完成了。
1 | # Sidebar Avatar |
以上就是NexT主題大部分常用的設定,其他可以再自行研究看裡面的內容 ~
Theme NexT Canvas Nest
Theme NexT Canvas Nest是一個很有科技感炫炮的背景(本站使用之背景),
要如何設定這個炫炮的背景,
首先,先到根目錄source/中創一個_data/資料夾,
並在_data/資料夾中,創一個footer.swig檔案,footer.swig檔案中寫入並儲存以下code:
1 | <script color="0,0,255" opacity="0.5" zIndex="-1" count="300" src="https://cdn.jsdelivr.net/npm/canvas-nest.js@1/dist/canvas-nest.js"></script> |
寫完儲存後,
只要到根目錄_config.yml檔案中將footer註解拿掉即可。
1 | # Define custom file paths. |
實際使用Hexo
Blog基本上就是拿來寫文章用的,
在寫文章的過程中,
一定會有將文章分類的需求(還是只有我有強迫症XDD),
因此,建立一個分類選項、標籤是非常重要的。
創建分類選項、標籤
在Hexo中想要將文章分類,需要先創建一個分類選項,
透過下面指令,創建一個分類頁面:
1 | $hexo new page categories |
創建後,source/categories/資料夾中會有一個檔案index.md,
內容預設是像這樣:
1 |
|
之後將type加入到內容中並儲存
1 |
|
使用:只要在文章前面加入categories就可以將文章分類
1 |
|
同樣的,如果要創造標簽的話,
只需要照前面的步驟創建tags即可。
這裡要注意的是:
一篇文章只能有一種分類,
如果在這加入多個分類,
將會默認選擇第一個分類。
Hexo其他常用套件
hexo-addlink
功能:在每篇文章最後添加永久鏈接及文字(像簽名檔、版權聲明的概念)。
安裝、使用:安裝hexo-addlink套件後,
1 | $npm install hexo-addlink |
將下面的code加在根目錄_config.yml檔案中。
1 | addlink: |
hexo-generator-sitemap
功能:Google是透過sitemap來取得網站資料,但Hexo並無內建必須額外安裝套件,才能讓你的Blog被搜尋到。
安裝、使用:安裝hexo-generator-sitemap套件後,
1 | $npm install hexo-generator-sitemap |
在根目錄的_config.yml中加入以下code即可。
1 | # Sitemap |
完成後,以後在產生靜態網頁時,將會自動產生出sitemap.xml檔案,進一步了解sitemap.xml是什麼
(可以在https://<user_name>.github.io/sitemap.xml查看sitemap.xml是否產生成功)
以上步驟完成後,
要到Google Search Console輸入Blog網址以及sitemap.xml,如下: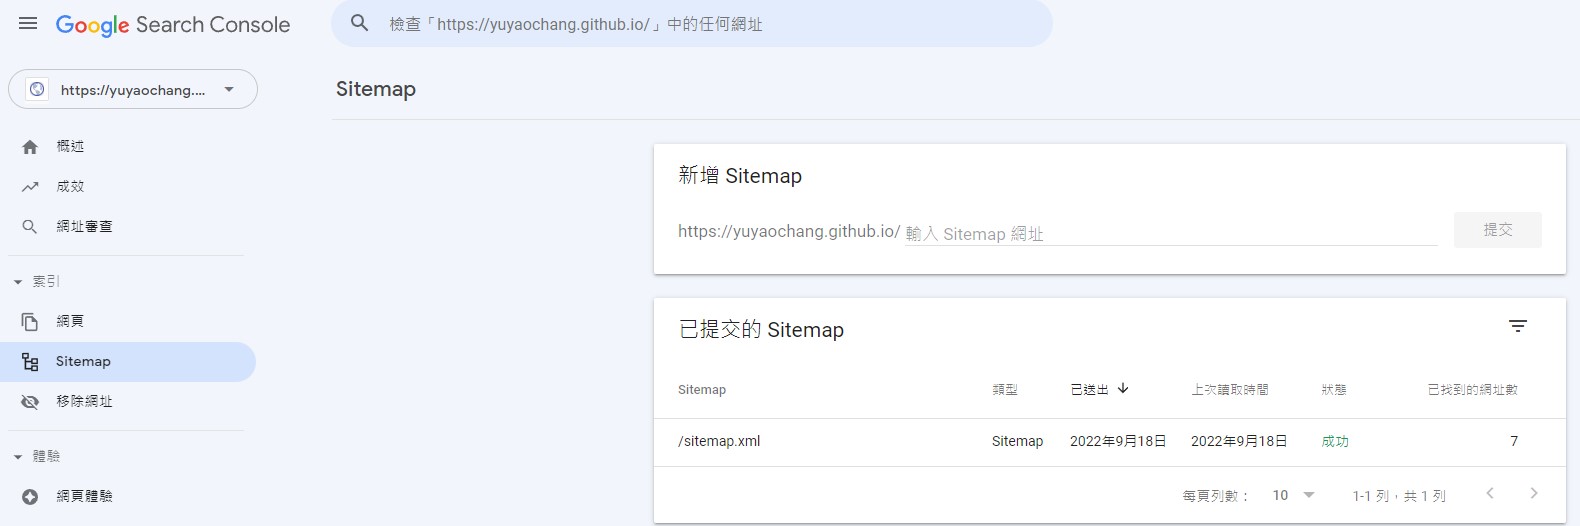
看到狀態成功,即完成sitemap設定,
之後Google就會定期看這個檔案是否有更新,
如果有更新將會把新的網址(新文章的分頁)加入Google搜尋引擎中。
後續如果有文章不想加入搜尋引擎中,也可以在標題部分加入:
1 |
|
這樣那篇文章就不會加入Google搜尋引擎中。
hexo-generator-searchdb
功能:在Blog中使用關鍵字搜索文章
安裝、使用:安裝hexo-generator-searchdb套件後,
1 | $npm install hexo-generator-searchdb |
到themes/source/next/_config.yml檔案,
找到以下這段code,
1 | local_search: |
改成enable: true即可。
當然還有很多hexo套件可以使用,可以依照個人需求去找找~
作者:Ian Chang
網址: https://yuyaochang.github.io/2022/09/18/NexT主題設定、實際使用Hexo及Hexo其他常用套件/
版權聲明:Blog中所有文章除特別聲明外,均採用 CC BY-NC-SA 3.0 TW 許可協議,若要轉載請註明出處